这里介绍webpack的基本使用。
1、打包js后引用
1.1 文件准备
在一个单独的目录中新建配置文件00_webpackhello/package.json:
{
  "name": "00_webpackhello",
  "version": "1.0.0",
  "description": "",
  "main": "index.js",
  "scripts": {
    "test": "echo \"Error: no test specified\" && exit 1",
    "build": "webpack --mode development"
  },
  "keywords": [],
  "author": "",
  "license": "ISC",
  "devDependencies":{
    "webpack": "^5.74.0",
    "webpack-cli": "^4.10.0"
  }
}
在同目录下新建配置文件00_webpackhello/webpack.config.js:
const path = require('path');

module.exports = {
    entry: './src/main.js',
    output: {
        path: path.resolve(__dirname, 'dist'),
        filename: 'bundle.js',
    },
};
在相同目录下新建src目录,并创建待打包的js文件。
00_webpackhello/src/compute.js:
var testNum1 = 6, testNum2 = 3;
function add(a, b) {
    return a + b;
}
function minus(a, b) {
    return a - b;
}
function multiply(a, b) {
    return a * b;
}
function divide(a, b) {
    return a / b;
}
//这里导出一个默认变量
export {
    add,
    minus,
    multiply,
    divide
}
00_webpackhello/src/main.js:
import * as tmp from './compute.js'
var num1 = 10, num2 = 2;
alert("testNum1: " + ", testNum2: " +  " " + tmp.add(num1, num2) + " " + tmp.minus(num1, num2)+ " " + tmp.multiply(num1, num2)+ " " + tmp.divide(num1, num2));
添加gitignore配置文件00_webpackhello/.gitignore:
dist/
node_modules/
新建一个测试html文件,用于引用打包后的js文件,看是否有效。
00_webpackhello/index.html:
<!-- 其他省略 -->
<body>
<script src="dist/bundle.js"></script>
</body>
1.2 环境安装
在当前目录下执行如下npm install命令,npm会自动根据package.json配置文件中的依赖进行安装。
$ npm install

up to date in 692ms
$
执行完成后,这个目录下会生成一个package-lock.json配置文件,我们一般不用管它。同时,前面在package.json中配置的依赖,应该会自动安装到00_webpackhello/node_modules目录下。
1.3 打包
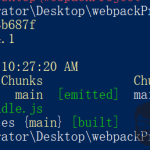
在当前目录下执行打包命令:
$ npm run build

> 00_webpackhello@1.0.0 build
> webpack --mode development

asset bundle.js 4.79 KiB [emitted] (name: main)
runtime modules 670 bytes 3 modules
cacheable modules 513 bytes
  ./src/main.js 219 bytes [built] [code generated]
  ./src/compute.js 294 bytes [built] [code generated]
webpack 5.75.0 compiled successfully in 132 ms
$
在当前目录会新生成一个dist目录,其中包含打包生成的文件00_webpackhello/dist/bundle.js。打包之后的完整目录结构如下图。

1.4 测试
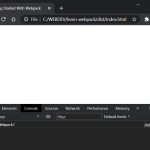
这时候,如果在浏览器中打开前面创建的index.html,可以看到js已经生效。如下图。

2、打包为js依赖库
2.1 直接作为依赖库引用报错
前面的例子中,如果在index.html中直接写一个script标签,调用add函数,如下:
<!-- 其他省略 -->
<body>
<script src="dist/bundle.js"></script>
<script>
    alert(add(1,2));
</script>
</body>
会报错add没有定义。这是因为在javascript的模块化语法里面,在每一个模块文件中定义的函数和变量都是局部变量,所以,在模块范围之外没法引用。
2.2 依赖库打包配置说明
webpack支持将js文件打包为依赖库,供其他人调用。通过library的配置可以支持指定库的名称, libraryTarget指定库打包出来的规范。
其中,可选的值有“var、assign、this、window、global、commonjs、commonjs2、commonjs”。
不同取值的打包行为说明如下:
// var config
{
    output: {
        library: 'myLib',
            filename: 'var.js',
            libraryTarget: 'var'
    }
}
// output
var myLib = (function (modules) { })({
    './src/index.js': function (module, exports) { }
});
// ===============================================

// assign config
{
    output: {
        library: 'myLib',
            filename: 'assign.js',
            libraryTarget: 'assign'
    }
}
// output: 少了个 var
myLib = (function (modules) { })({
    './src/index.js': function (module, exports) { }
});
// ===============================================

// this config{
{
    output: {
        library: 'myLib',
            filename: 'this.js',
            libraryTarget: 'this'
    }
}
// output
this["myLib"] = (function (modules) { })({
    './src/index.js': function (module, exports) { }
});
// ===============================================

// window config
{
    output: {
        library: 'myLib',
            filename: 'window.js',
            libraryTarget: 'window'
    }
}
// output
window["myLib"] = (function (modules) { })({
    './src/index.js': function (module, exports) { }
});
// ===============================================

// global config
{
    output: {
        library: 'myLib',
            filename: 'global.js',
            libraryTarget: 'global'
    }
}

// output:注意 target=node 的时候才是 global,默认 target=web下global 为 window
window["myLib"] = (function (modules) { })({
    './src/index.js': function (module, exports) { }
});
// ===============================================

// commonjs config
{
    output: {
        library: 'myLib',
            filename: 'commonjs.js',
            libraryTarget: 'commonjs'
    }
}
// output
exports["myLib"] = (function (modules) { })({
    './src/index.js': function (module, exports) { }
});
// ===============================================

// amd config
{
    output: {
        library: 'myLib',
            filename: 'amd.js',
            libraryTarget: 'amd'
    }
}
// output
define('myLib', [], function () {
    return (function (modules) { })({
        './src/index.js': function (module, exports) { }
    });
});
// ===============================================

// umd config
{
    output: {
        library: 'myLib',
            filename: 'umd.js',
            libraryTarget: 'umd'
    }
}
// output
(function webpackUniversalModuleDefinition(root, factory) {
    if (typeof exports === 'object' && typeof module === 'object')
        module.exports = factory();
    else if (typeof define === 'function' && define.amd) define([], factory);
    else if (typeof exports === 'object') exports['myLib'] = factory();
    else root['myLib'] = factory();
})(window, function () {
    return (function (modules) { })({
        './src/index.js': function (module, exports) { }
    });
});
// ===============================================

// commonjs2 config
{
    output: {
        library: 'myLib',
            filename: 'commonjs2.js',
            libraryTarget: 'commonjs2'
    }
}
//output
module.exports = (function(modules) {})({
    './src/index.js': function(module, exports) { }
});
// ===============================================

// umd2 config
{
    output: {
        library: 'myLib',
            filename: 'umd2.js',
            libraryTarget: 'umd2'
    }
}
// output
(function webpackUniversalModuleDefinition(root, factory) {
    if (typeof exports === 'object' && typeof module === 'object')
        module.exports = factory();
    else if (typeof define === 'function' && define.amd) define([], factory);
    else if (typeof exports === 'object') exports['myLib'] = factory();
    else root['myLib'] = factory();
})(window, function () {
    return (function (modules) { })({
        './src/index.js': function (module, exports) {
        }
    });
});
// ===============================================

// commonjs-module config
{
    output: {
        library: 'myLib',
            filename: 'commonjs-module.js',
            libraryTarget: 'commonjs-module'
    }
}
// output
module.exports = (function (modules) { })({
    './src/index.js': function (module, exports) { }
});
// ===============================================

// jsonp config
{
    output: {
        library: 'myLib',
            filename: 'jsonp.js',
            libraryTarget: 'jsonp'
    }
}
// output
myLib((function (modules) { })({
    './src/index.js': function (module, exports) { }
}));
// ===============================================
简单说明见下图:

2.3 依赖库打包示例
这里将前面的例子中的代码,打包为可以在script标签中引用的依赖库。
首先,修改打包的配置文件00_webpackhello/webpack.config.js:
const path = require('path');

module.exports = {
    entry: './src/main.js',
    output: {
        path: path.resolve(__dirname, 'dist'),
        filename: 'bundle.js',
        //指定打包后的库通过全局变量的方式暴露
        libraryTarget: "var",
        //指定打包后的库名
        library: "MATH"
    },
};
然后,修改测试文件00_webpackhello/index.html,在script标签中调用前面的依赖函数,如下。
<!-- 其他省略 -->
<body>
<script src="dist/bundle.js"></script>
<script>
    alert(MATH.add(1,2));
</script>
</body>
这样,在00_webpackhello目录下执行npm run build打包命令之后,在浏览器中打开测试文件00_webpackhello/index.html,可以看到能够正常被调用。第一个alert弹出之后,第二个alert,也可以正常弹出,如下图:

实际上,这样打包之后,也可以在单独的js文件中引用。这里新建一个00_webpackhello/callTest.js文件:
alert(MATH.multiply(22,2));
在测试文件00_webpackhello/index.html中,引用这个文件,如下:
<!-- 其他省略 -->
<body>
<script src="dist/bundle.js"></script>
<script src="callTest.js"></script>
<script>
    alert(MATH.add(1,2));
</script>
</body>
在浏览器中打开上述测试文件之后,可以看到三个alert框,说明在单独的js文件中,也可以被调用到。
3、打包css
3.1 将css打包到js中
3.1.1 预处理器css-loader和style-loader简介
这里需要用到两个预处理器css-loader和style-loader。css-loader的作用是解析css文件,包括解析@import等css自身语法,它会将解析后的css文件以字符串的形式打包到js文件中(但此时,css样式并不会生效,因为需要把css文件插入到html中才会生效)。style-loader的作用就是把js中的样式代码插入到html中。它的原理很简单,就是通过动态生成style标签并将其插入到html文件的head标签中。
3.1.2 打包css到js示例
在一个新的目录01_webpackhello中新建如下文件。
npm配置文件,01_webpackhello/package.json:
{
  "name": "00_webpackhello",
  "version": "1.0.0",
  "description": "",
  "main": "index.js",
  "scripts": {
    "test": "echo \"Error: no test specified\" && exit 1",
    "build": "webpack --mode development"
  },
  "keywords": [],
  "author": "",
  "license": "ISC",
  "devDependencies": {
    "css-loader": "^6.7.2",
    "style-loader": "^3.3.1"
  }
}
webpack配置文件,01_webpackhello/webpack.config.js:
const path = require('path');

module.exports = {
    entry: './src/main.js',
    output: {
        path: path.resolve(__dirname, 'dist'),
        filename: 'bundle.js'
    },
    module: {
        rules: [
            {
                test: /\.css$/i,
                //执行顺序从右向左,将css-loader处理后的结果传给style-loader
                use: ['style-loader', 'css-loader'],
            },
        ],
    },
};
添加gitignore配置文件01_webpackhello/.gitignore:
dist/
node_modules/
新建javascript代码,01_webpackhello/src/main.js:
import './css/all.css'; // 使用 ESM 方式引入
const name = 'Paopao';
alert('Hello ' + name);
console.log('Hello ' + name);
新建css代码,01_webpackhello/src/css/all.css:
.text-primary {
    color: rgb(37, 37, 177);
}
新建一个测试打包效果的html文件,01_webpackhello/index.html:
<html>
<head>
    <!-- 引入打包生成的 JavaScript -->
    <script src="dist/bundle.js"></script>
</head>
<body>
<h1 class="text-primary" id="hello_h1">Hello World</h1>
</body>
</html>
在该目录下执行npm install命令,npm会自动根据package.json配置文件中的依赖进行安装。
然后,执行npm run build命令,就可以执行打包操作。打包后的目录结构如下。

这时候,在浏览器中打开前面新建的01_webpackhello/index.html,可以看到css已经生效,弹出alert框之后,字体显示为蓝色,如下。

3.2 处理css引入的图片
3.2.1 file-loader简介
file-loader是一个文件资源预处理器,作用是:处理文件导入语句(比如js的import ... from ...和css中的url())并替换成它的访问地址,同时把文件输出到相应的位置。
3.2.2 处理css引入图片的打包示例
首先,修改npm配置文件01_webpackhello/package.json:
{
  "name": "00_webpackhello",
  "version": "1.0.0",
  "description": "",
  "main": "index.js",
  "scripts": {
    "test": "echo \"Error: no test specified\" && exit 1",
    "build": "webpack --mode development"
  },
  "keywords": [],
  "author": "",
  "license": "ISC",
  "devDependencies": {
    "css-loader": "^5.0.2",
    "style-loader": "^2.0.0",
    "file-loader": "^5.1.0"
  }
}
注意:如果style-loader、css-loader、file-loader这几个的版本号不配套,会导致一个图片打包后生成两个,其中一个还不能用的情况。
修改webpack配置文件,增加file-loader的处理,01_webpackhello/webpack.config.js:
const path = require('path');

module.exports = {
   entry: './src/main.js',
   output: {
       path: path.resolve(__dirname, 'dist'),
       filename: 'bundle.js'
   },
   module: {
       rules: [
           {
               test: /\.css$/I,
               //执行顺序从右向左,将css-loader处理后的结果传给style-loader
               use: ['style-loader', 'css-loader'],
           },
           {
               test: /\.png$/,
               use: "file-loader"
           }
       ],
   },
};
修改样式表文件,01_webpackhello/src/css/all.css:
.text-primary {
    color: rgb(37, 37, 177);
}
body{
    background: url("img/cat.png") no-repeat;
}
同时,新增一个图片文件img/cat.png。
在该目录下执行npm install命令,npm会自动根据package.json配置文件中的依赖进行安装。
然后,执行npm run build命令,就可以执行打包操作。打包后的目录结构如下。

这时,在浏览器中打开前面新建的01_webpackhello/index.html,可以看到css已经生效,弹出alert框之后,字体显示为蓝色,并且有背景图片,如下。

3.2.3 指定css引入图片打包后的文件名和存放路径
前面的例子中,可以看出,css引用的图片在打包之后,文件名成了一个hash串。如果我们想要指定图片文件名和存放位置,只需要修改webpack配置文件,给file-loader传入options。如下。
01_webpackhello/webpack.config.js:
const path = require('path');

module.exports = {
    entry: './src/main.js',
    output: {
        path: path.resolve(__dirname, 'dist'),
        filename: 'bundle.js'
    },
    module: {
        rules: [
            {
                test: /\.css$/I,
                //执行顺序从右向左,将css-loader处理后的结果传给style-loader
                use: ['style-loader', 'css-loader'],
            },
            {
                test: /\.png$/,
                use: {
                    loader: "file-loader",
                    options: {
                        name: 'img/[name].[ext]'
                    }
                }
            }
        ],
    },
};
执行npm run build命令,就可以执行打包操作。打包后的目录结构如下。

,在浏览器中打开前面新建的01_webpackhello/index.html,可以看到css已经生效,弹出alert框之后,字体显示为蓝色,并且有背景图片,如下。

3.3 将css打包成到单独的文件
还是前面的例子,代码不变,修改打包的相关配置。
首先,修改npm配置文件01_webpackhello/package.json,增加mini-css-extract-plugin依赖:
{
  "name": "00_webpackhello",
  "version": "1.0.0",
  "description": "",
  "main": "index.js",
  "scripts": {
    "test": "echo \"Error: no test specified\" && exit 1",
    "build": "webpack --mode development"
  },
  "keywords": [],
  "author": "",
  "license": "ISC",
  "devDependencies": {
    "css-loader": "^5.0.2",
    "style-loader": "^2.0.0",
    "file-loader": "^5.1.0",
    "mini-css-extract-plugin": "^2.6.1"
  }
}
修改打包的配置文件01_webpackhello/webpack.config.js,这里将css打包到dist/css/img/main.css:
const path = require('path');
//step 1: 加载mini-css-extract-plugin
const MiniCssExtractPlugin = require('mini-css-extract-plugin');

module.exports = {
    //这样,可以配置多个entry,同时打包多个文件
    entry: {
      main: './src/main.js',
    },
    output: {
        path: path.resolve(__dirname, 'dist'),
        filename: 'bundle.js'
    },
    module: {
        rules: [
            {
                test: /\.css$/i,
                //执行顺序从右向左,将css-loader处理后的结果传给MiniCssExtractPlugin.loader
                use: [MiniCssExtractPlugin.loader, 'css-loader'],
            },
            {
                test: /\.png$/,
                use: {
                    loader: "file-loader",
                    options: {
                        name: 'css/img/[name].[ext]'
                    }
                }
            }
        ],
    },

    //step 2: 创建mini-css-extract-plugin实例
    plugins: [
        new MiniCssExtractPlugin({
            //指定css输出的文件
            filename: 'css/[name].css'
        })
    ]
};
修改测试的html文件01_webpackhello/index.html,引用前面打包的css:
<html>
<head>
    <!-- 引入打包生成的 JavaScript -->
    <!--<script src="dist/bundle.js"></script>-->    <link rel="stylesheet" href="dist/css/main.css"/>
</head>
<body>
<h1 class="text-primary" id="hello_h1">Hello World</h1>
</body>
</html>
在该目录下执行npm install命令,npm会自动根据package.json配置文件中的依赖进行新增安装mini-css-extract-plugin。
然后,执行npm run build命令,就可以执行打包操作。

,在浏览器中打开前面新建的01_webpackhello/index.html,可以看到css已经生效,弹出alert框之后,字体显示为蓝色,并且有背景图片,如下。

3.4 使用asset modules处理图片文件
asset modules是webpack5新加入的功能,称为资源模块,通过它,无需使用额外的预处理器,就可以将图片和字体等文件进行解析和处理。
在上面例子的基础上,修改webpack打包的配置文件01_webpackhello/webpack.config.js,通过asset modules处理图片资源:
const path = require('path');
//step 1: 加载mini-css-extract-plugin
const MiniCssExtractPlugin = require('mini-css-extract-plugin');

module.exports = {
    //这样,可以配置多个entry,同时打包多个文件
    entry: {
      main: './src/main.js',
    },
    output: {
        path: path.resolve(__dirname, 'dist'),
        filename: 'bundle.js'
    },
    module: {
        rules: [
            {
                test: /\.css$/i,
                //执行顺序从右向左,将css-loader处理后的结果传给MiniCssExtractPlugin.loader
                use: [MiniCssExtractPlugin.loader, 'css-loader'],
            },
            {
                test: /\.png$/,
                type: 'asset/resource',
                generator: {
                    filename: 'css/img/[name].[ext]'
                }
            }
        ],
    },

    //step 2: 创建mini-css-extract-plugin实例
    plugins: [
        new MiniCssExtractPlugin({
            //指定css输出的文件
            filename: 'css/[name].css'
        })
    ]
};
执行npm run build命令,就可以执行打包操作。

,在浏览器中打开前面新建的01_webpackhello/index.html,可以看到css已经生效,弹出alert框之后,字体显示为蓝色,并且有背景图片,如下。