您可能需要比存储库中的版本更新的 Nginx 版本。截至今日(2019 年 4 月 30 日),最新版本为 1.16.0。Nginx 开发人员维护一个最新版本的 yum 存储库。我建议使用存储库,因为它更容易使 Nginx 保持最新。Nginx Linux 软件包页面解释了如何将其存储库添加到您的系统并从中安装 Nginx。如果您仍希望从源代码安装,请继续阅读。
在 CentOS 上从源代码安装 Nginx 的过程步骤相对较少。他们是
- 安装一些必需的软件包
- 创建非特权服务帐户
- 下载 Nginx 源码
- 编译安装 Nginx
- 创建一个 SystemD 单元文件
- 创建 SystemD 环境文件
- 测试安装
- 配置 Nginx
- 使 Nginx 在启动时启动
安装所需的软件包
编译和运行 Nginx 1.16.0 需要来自存储库的几个包。使用以下命令安装它们:
[root@centos7 ~]# yum install \
gcc \
zlib-devel \
openssl-devel \
make \
pcre-devel \
libxml2-devel \
libxslt-devel \
libgcrypt-devel \
gd-devel \
perl-ExtUtils-Embed \
GeoIP-devel
创建非特权服务帐户
创建一个与 EPEL 存储库中的 Nginx 包创建的服务帐户相同的服务帐户:
[root@centos7 ~]# groupadd -g 994 nginx
[root@centos7 ~]# useradd -g 994 -u 996 -c "Nginx web server" -d /var/lib/nginx -s /sbin/nologin nginx
如果你得到下面的输出,你可以安全地继续前进。这只是意味着 Nginx 已经或已经从存储库安装。
[root@centos7 ~]#  groupadd -g 994 nginx
groupadd: group 'nginx' already exists
[root@centos7 ~]# useradd -g 994 -u 996 -c "Nginx web server" -d /var/lib/nginx -s /sbin/nologin nginx
useradd: user 'nginx' already exists
下载 Nginx 源码
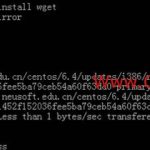
使用curl下载 Nginx 源代码:
[root@centos7 ~]# curl -L https://github.com/nginx/nginx/archive/release-1.16.0.tar.gz > nginx-release-1.16.0.tar.gz使用tar提取源代码存档:
[root@centos7 ~]# tar xf nginx-release-1.16.0.tar.gz编译 Nginx
将工作目录更改为存档文件创建的目录:
[root@centos7 ~]# cd nginx-release-1.16.0官网的Building Nginx from Sources页面提供了选项的描述。
配置编译时选项:
[root@centos7 nginx-release-1.16.0]# auto/configure \
--with-pcre \
--prefix=/opt/nginx-1.16.0 \
--user=nginx \
--group=nginx \
--with-threads \
--with-file-aio \
--with-http_ssl_module \
--with-http_v2_module \
--with-http_realip_module \
--with-http_addition_module \
--with-http_xslt_module=dynamic \
--with-http_image_filter_module \
--with-http_geoip_module=dynamic \
--with-http_sub_module \
--with-http_dav_module \
--with-http_flv_module \
--with-http_mp4_module \
--with-http_gunzip_module \
--with-http_gzip_static_module \
--with-http_auth_request_module \
--with-http_random_index_module \
--with-http_secure_link_module \
--with-http_degradation_module \
--with-http_slice_module \
--with-http_stub_status_module \
--without-http_charset_module \
--with-http_perl_module \
--with-mail=dynamic \
--with-mail_ssl_module \
--with-stream=dynamic \
--with-stream_ssl_module \
--with-stream_realip_module \
--with-stream_geoip_module=dynamic \
--with-stream_ssl_preread_module
编译安装 Nginx:
[root@centos7 nginx-release-1.16.0]# make
[root@centos7 nginx-release-1.16.0]# make install
创建一个 SystemD 单元
如果您使用的是最小系统,则可能唯一可用的文本编辑器是vi。如果是这种情况并且您不想安装另一个编辑器,我写了一个简短的教程来解释基础知识。
创建单元文件。将以下内容添加到文件/etc/systemd/system/nginx-1.16.0.service:
[Unit]
Description=nginx 1.16.0
After=syslog.target network.target

[Service]
Type=forking
EnvironmentFile=/etc/sysconfig/nginx-1.16.0
ExecStart=/opt/nginx-1.16.0/sbin/nginx $CLI_OPTIONS
ExecReload=/opt/nginx-1.16.0/sbin/nginx -s reload
ExecStop=/opt/nginx-1.16.0/sbin/nginx -s quit

[Install]
WantedBy=multi-user.target
将单元文件加载到 SystemD 中:
[root@centos7 nginx-release-1.16.0]# systemctl daemon-reload为 Nginx 创建环境文件。将以下内容添加到/etc/sysconfig/nginx-1.16.0:
# Command line options to use when starting nginx
#CLI_OPTIONS=""
测试您的安装
启动 Nginx:
[root@centos7 ~]# systemctl start nginx-1.16.0[root@centos7 ~]# curl http://localhost | grep 'Thank you'
% Total % Received % Xferd Average Speed Time Time Time Current
Dload Upload Total Spent Left Speed
100 612 100 612 0 0 117k 0 --:--:-- --:--:-- --:--:-- 149k
<p><em>Thank you for using nginx.</em></p>配置 Nginx
配置 Nginx 超出了本指南的范围。请参阅官方文档以获取指导。
使 Nginx 在引导时启动
以下命令将确保 Nginx 在系统启动时自动启动:
[root@centos7 ~]# systemctl enable nginx-1.16.0


在 CentOS 7 上从源代码编译安装 Nginx