PBX is short fro Private Branch Exchange. It is a private telephone system used within an organization and customized to suit the needs of a particular organization. PBX users from an organization can communicate internally amongst themselves and also externally with the outside world. External communication is facilitated by channels such as VoIP (Voice over IP), ISDN (Integrated Services Digital Network) or analog.
The advantages of using PBX phone systems are that you can get more phones than the physical lines, free calls between users and massive features such as call queues, Digital receptionist, call forwarding, voicemail and call recording among others. Some examples of PBX phone systems include FreeSwitch, 3cx, Elastix, FreePBX and Asterisk.
In this guide, we are going to look at how to install FreeSwitch PBX on Ubuntu 20.04/18.04
What is FreeSwitch PBX?
FreeSwitch is a free open-source communication platform. It enables real time communication, video and Voice over IP and WebRTC. It runs on Windows, MacOS, Linux and FreeBSD. It is used in building a PBX system with functionalities such as web conferencing with chats and screen sharing, IVR, Session Border Controller, wholesale least-cost routing among others.
What are some of the features of FreeSwitch PBX system?
- Runs on Windows, Linux and FreeBSD
- IVR API
- WebRTC support
- Call recording (In Stereo caller/callee left/right)
- High Performance Multi-Threaded Core engine
- Parallel Hunting
- Serial Hunting
- Automated Attendant
- Basic IP/PBX features
- Custom Ring Back Tones (Early Media)
注:在安装前先安装:
sudo apt-get install libavformat-dev
sudo apt-get install libswscale-dev
sudo apt-get install libpq-dev
Install FreeSwitch PBX on Ubuntu 20.04/18.04
First update your system packages
sudo apt -y updateNext, install dependencies required for running FreeSwitch PBX on Ubuntu 20.04/18.04
sudo apt install -y git subversion build-essential autoconf automake libtool libncurses5 libncurses5-dev make libjpeg-dev libtool libtool-bin libsqlite3-dev libpcre3-dev libspeexdsp-dev libldns-dev libedit-dev yasm liblua5.2-dev libopus-dev cmakeThe following packages are optional but we can install them.
sudo apt install -y libcurl4-openssl-dev libexpat1-dev libgnutls28-dev libtiff5-dev libx11-dev unixodbc-dev libssl-dev python-dev zlib1g-dev libasound2-dev libogg-dev libvorbis-dev libperl-dev libgdbm-dev libdb-dev uuid-dev libsndfile1-devInstall libks and signal wire
sudo apt install -y cmake
cd /usr/src
sudo git clone https://github.com/signalwire/libks.git
cd libks
sudo cmake .
sudo make
sudo make install

cd /usr/src
git clone https://github.com/signalwire/signalwire-c.git
cd signalwire-c
sudo cmake .
sudo make
sudo make install
Next, get the latest FreeSwitch version from releases page using wget:
cd /usr/src
sudo wget https://files.freeswitch.org/freeswitch-releases/freeswitch-1.10.3.-release.zip
sudo apt -y install unzip
sudo unzip freeswitch-1.10.3.-release.zip
cd freeswitch-1.10.3.-release/
Note that if you do not have unzip installed, install it by running apt -y install unzip
sudo apt -y install unzipNow run standard installation process
sudo ./configure -C
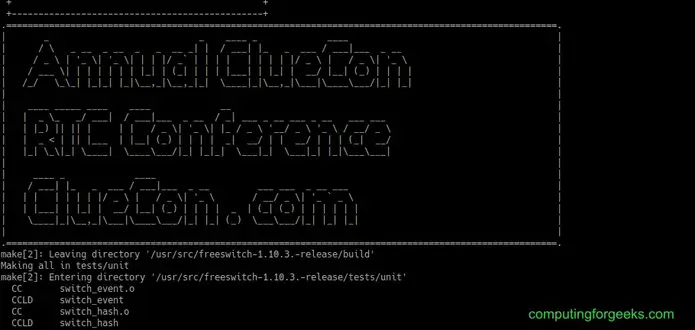
sudo make
If you encounter errors during compilation, you can comment out any module throwing the error or install the missing dependencies. In my case, I had initially commented out languages/mod_lua and applications/mod_signalwire but you can comment out more depending on the errors you get. After which you restart the compilation as shown below:
sudo ./configure && sudo make clean && sudo makeFor a successful compilation, you will see an output as below:

Next, install freeswitch:
sudo make installOutput

Now compile sounds
sudo make all cd-sounds-install cd-moh-installCreate simlinks to use services easily.
sudo ln -s /usr/local/freeswitch/bin/freeswitch /usr/bin/
sudo ln -s /usr/local/freeswitch/bin/fs_cli /usr/bin
Add new group and user with less privileges to run FreeSWITCH service.
cd /usr/local
sudo groupadd freeswitch
sudo adduser --disabled-password  --quiet --system --home /usr/local/freeswitch --gecos "FreeSWITCH Voice Platform" --ingroup freeswitch freeswitch
sudo chown -R freeswitch:freeswitch /usr/local/freeswitch/
sudo chmod -R ug=rwX,o= /usr/local/freeswitch/
sudo chmod -R u=rwx,g=rx /usr/local/freeswitch/bin/
We need to add FreeSwitch as a systemd unit file. Open new file /etc/systemd/system/freeswitch.service using your favorite editor paste the below content:
sudo vim /etc/systemd/system/freeswitch.servicePaste the following content
[Unit]
Description=freeswitch
Wants=network-online.target
Requires=syslog.socket network.target local-fs.target
After=syslog.socket network.target network-online.target local-fs.target

[Service]
Type=forking
Environment="DAEMON_OPTS=-nonat"
EnvironmentFile=-/etc/default/freeswitch
ExecStartPre=/bin/chown -R freeswitch:freeswitch /usr/local/freeswitch
ExecStart=/usr/bin/freeswitch -u freeswitch -g freeswitch -ncwait $DAEMON_OPTS
TimeoutSec=45s
Restart=always
RestartSec=90
StartLimitInterval=0
StartLimitBurst=6

User=root
Group=daemon
LimitCORE=infinity
LimitNOFILE=100000
LimitNPROC=60000
LimitSTACK=250000
LimitRTPRIO=infinity
LimitRTTIME=infinity
IOSchedulingClass=realtime
IOSchedulingPriority=2
CPUSchedulingPolicy=rr
CPUSchedulingPriority=89
UMask=0007
NoNewPrivileges=false

[Install]
WantedBy=multi-user.target
Start FreeSwitch service and enable it on boot
sudo chmod ugo+x freeswitch.service
sudo systemctl start freeswitch.service
sudo systemctl enable freeswitch.service
Now check status of FreeSWITCH service
sudo systemctl status freeswitch.serviceIf freeswitch is properly installed and running the output should be as shown

Now you can connect to FreeSWITCH using client as below
# fs_cli -rYou will see an output as below:

PBX related courses


